A true regular square is a very important start for getting a good result
in origami. Though we have those
ready-made square
papers dedicated for origami , they are indeed too small and only suitable
for simple
origami only. In addition , many of them , strictly
speaking , are not true regular squares. In most cases,
we have to cut
the squares from a large sheet of paper by ourselves. So an
efficient and reliable way of
cutting a true square would be of great
help to get a good start and a satisfactory end product. The
following method of cutting true squares was devised by me many years
ago and has been being
employed ever since .
A) Tools

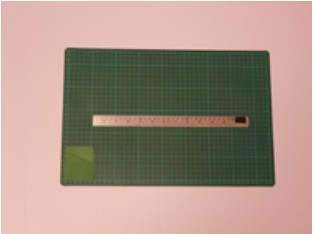
1/ Cutting mat
If you are always in need of large squares for doing complex
origami , I'd recommend the
size 58cm x 43cm. Otherwise
a 43cmx28cm mat would be sufficient for cutting squares
with
the side's length less than 30cm.
|
(58cm x 43cm
) |
(43cm x 28cm) |
2/ Cutter
An ordinary size cutter will do, better with an anti-sliding
lock. Being too light or purely
made from plastics should
best be
avoided
|
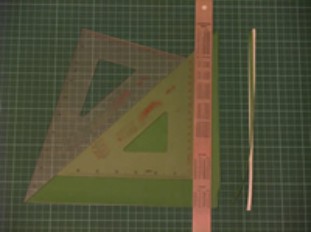
3/ A set of 45°
& 30°/ 60 °set squares
There are some special criteria
for these set squares. First, they have to be at least 2mm
in thickness. Second , the contact
sides must be straight-edged. ( see the photos) Those
with
slanted edges and curved edges are not suitable. In the
present
case , only the 45°
set square is really needed. But
the 30 °/ 60° set square is also used as an aid.
The most
suitable size of
the 45° set square is 18 cm in length on the side adjacent
to the right angle.
As accuracy is of paramount importance , only high quality
ones are recommended.
|
4/ Steel Ruler
The
most suitable size is 30 cm in length. In cutting squares with
side length greater
than the steel ruler's , we have
special means to overcome this problem. Though a
longer one
will also do , its heavy weight would be a hindrance in
handling. So it's
not recommended.
|
5/ A pair of scissors
B) Procedures
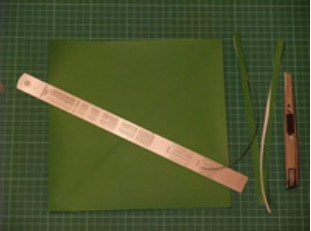
1/ Normally , we only have an approximate
size in mind and seldom need a square
with exact length. Those
large-sized
papers usually come in rectangular in shape.
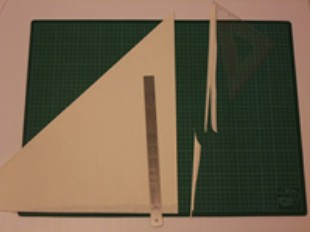
First we cut
a rough square from the large paper with a size slightly greater
than the desired size in mind.
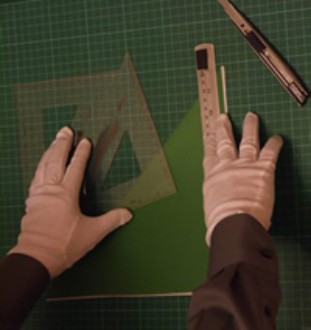
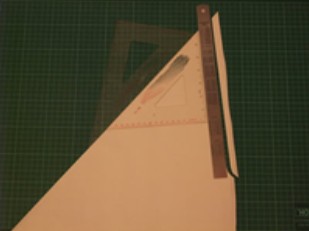
Fold along the diagonal of the rough square and crease firmly.
Position the triangle
so formed in the way as shown in the
photo.
|
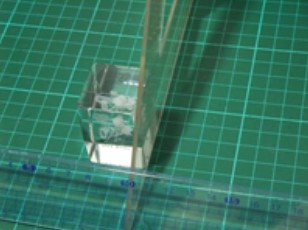
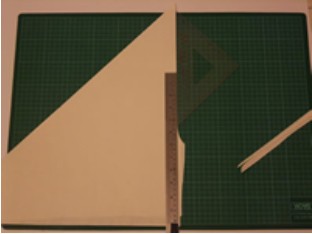
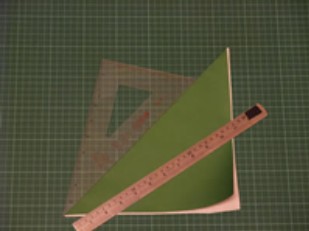
2/
Place the 30 °/ 60°set square with its slanted side
( hypotenuse) in close contact
with the slanted edge of the
paper. The
60° angle should be at the top with a
distance of about
6cm from the right top corner of the paper.
|
Note : The 30°/ 60 °set
square can be replaced by a straight ruler with the same features.
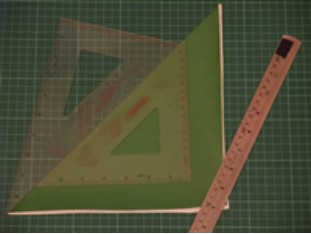
3/
Place the 45° set square with its slanted edge in close
contact with the 30°/ 60°se
square's. Be sure the right
top
corner of the 45° set square is slightly ( about 1cm)
beyond
the 60° corner.
|
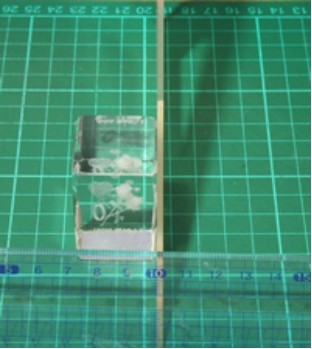
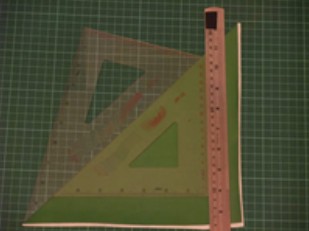
4/
Place the steel ruler in close contact with the right vertical
edge of the 45° set square.
Move the 45° set square together with the steel ruler towards
the right edge of the paper
by sliding it along the slanted
edge
of the 30° / 60° set square. You should stop at the
place just a little bit before the imaginary line where the
upper layer of
the paper overlaps
the lower layer completely throughout. If
you want a smaller square , just stop at a longer
distance from
the edge of the paper.
|
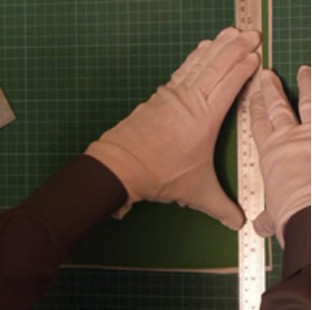
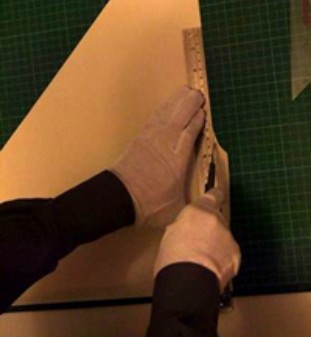
5/
In order to bring the ruler and set squares in true seamless
close contact , some
practices might be needed to obtain
greater accuracy. Hold the set squares with
your left hand as
shown in the photo. The middle finger and the thumb of the
left hand should push towards each other while the right hand
pressing on the stee
l ruler should push towards the vertical
edge of the 45° set square.
|

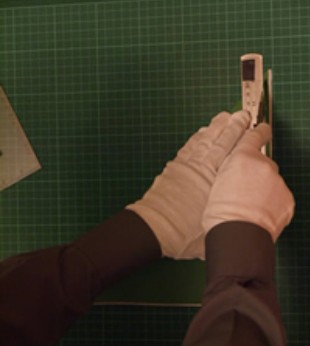
6/
Now press firmly on the steel ruler with your right hand , and
remove your
left hand together with the set squares.
With the index finger and middle finger
of your left hand pressing
together , place them on the steel ruler just about
5cm below the top corner of the paper. (This should also be
the position just
above the middle finger of your right
hand.) At the same time , place the ring
finger and the thumb
on the border line between the steel ruler and the paper.
This will help to counterbalance the inward push created during
the process
of cutting.
|
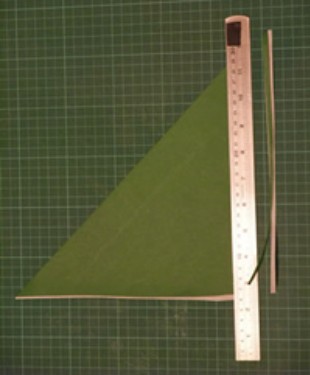
7/
Before placing the set squares and steel ruler together , make
sure the
cutter is in a nearby position where your right
hand can reach. Now press
the fingers of your left hand firmly
on the steel ruler and remove your right
hand to reach
the cutter. Then start cutting the paper along the free edge
of the steel ruler. After cutting off the paper on the right
side
of the steel
ruler , you'lll get a true 45° angle on the
paper.
|
Note : If the side length of the square to be cut is close to
the length of
the steel ruler's , displacement of the ruler
may take place when the cutter
blade approaches the lower end
portion of the ruler. This will usually be
the case
when thick paper or foil-backed paper is being cut. In this
case ,
we can make a remedy by synchronizing the left
hand fingers with the
movement of the cutter. When the cutter
blade has advanced to the
neighbourhood of the
thumb of your left hand , just pause the cuttingfor a
while.
Lift the fingers on the upper part onto a position just
above the thumb
, press firmly , and then move your thumb to
the lower portion of the ruler.
Afterwards , you can
resume the cutting to the end.
|
8/
Then turn the uncut side of the paper into the same position
as the start ,
and repeat the previous procedures. Finally a
45° isosceles triangle is formed
with two layers of paper
overlapping each other. When opened , a true regular
square
is
obtained.
|
Attention : Children should not perform the above activity alone
unless guided
by an adult or granted the permission to
do so. Best of all, this should be
performed by an adult or
person competent to carry out the task.
|
Supplement
How to cut a square with its side
length greater than the steel ruler.
1/ The basic procedures are the same as previously described.
This time
when the cutter blade reaches approximately 1
cm above the end point
of the ruler , curve it out to cut off
the paper.
|
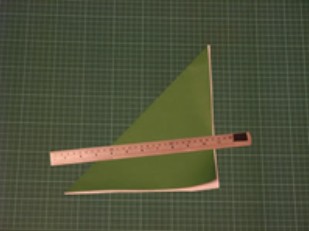
2/ Then move away everything. Place the slanted edge of the
45° set
square in closecontact with the previously cut
edge of the paper. The
lower corner of the set square should
be just slightly above the curve.
Stabilise the set square
with your right hand.
Then press the steel ruler
against the slanted edge of the set
square with at least 10cm in contact with
each other as
shown in the photo. The larger the contact area , the more
accurate
it will be.
|
3/
Stabilise the steel ruler with your left hand , then remove
your right hand
together with the set square. Start cutting
from
1cm above the curve and
continue until the end is reached. If
one additional cut is not sufficient , repeat
the above
procedure until it's done.
|
[ END ] |